
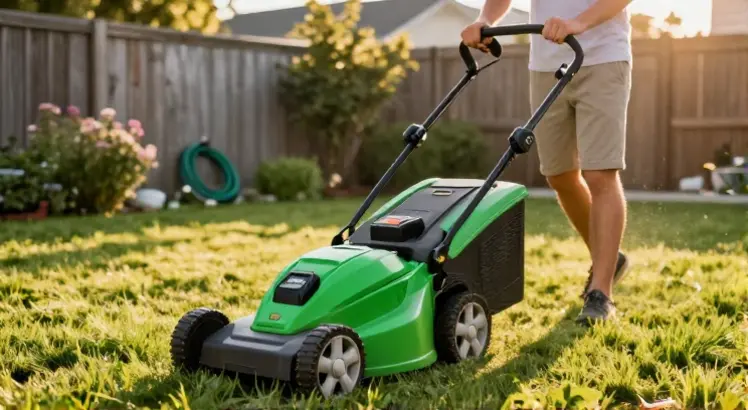
You have just unboxed your new Ryobi lawn mower and you are ready to tackle that overgrown grass. Knowing exactly how to use a Ryobi lawn mower properly will save you time, protect your machine, and give you a cleaner cut. This guide walks you through every step, from initial setup to the final storage, so you feel confident before you even pull the bail handle.
Whether you own a compact 18V model or a beefy 40V self-propelled beast, the core operation remains similar. We will cover battery insertion, cutting height adjustments, starting sequences, and those small overlooked details that make a big difference. Grab your safety glasses and let us get started.

Unboxing and Initial Assembly
When you first open the box, you will find the mower deck, the handle assembly, a grass catcher bag, and often a battery and charger in separate compartments. Start by laying out all parts on a clean, flat surface. Snap the lower handle pieces into the deck slots until you hear a firm click, then attach the upper handle using the provided knobs or bolts.
Most Ryobi walk-behind mowers use foldable handles that lock into place without tools. Tighten the hand knobs securely, but do not over-torque them. A loose handle can cause the mower to shut off unexpectedly because the safety key or bail might lose tension. If your model has a side discharge chute, attach it now by pressing it into the deck opening and securing the tabs.
Attach the grass bag by lifting the rear discharge door and hooking the bag frame onto the pivot points. Make sure the bag sits flush, or the mulching plug will not seal properly. For a quick visual reference, consult the quick-start guide tucked inside the box, which complements our basic lawn mower operation guide that covers universal mowing principles.
Understanding Your Ryobi Battery System

Ryobi OLM1833B 18V ONE+ Lawnmower
Check PriceRyobi cordless mowers run on the ONE+ 18V or 40V platform. The battery is the heart of your machine, so treating it correctly maximizes runtime and lifespan. Remove the battery from the charger once it reaches full charge, indicated by a solid green light on the charger. A blinking red light usually means a temperature fault, let the pack cool down before reinserting it.
Slide the charged battery into the mower deck compartment until it clicks. On dual-battery models like the 40V HP brushless units, you will see two bays. The mower draws power from both packs simultaneously, but it can operate with only one installed if you are mowing a very small patch. Always keep the protective rubber cap on unused terminals to prevent debris buildup.
If you are comparing battery platforms to measure efficiency, our analysis on compare Ryobi’s cordless performance provides real-world runtime tests that help you set expectations. Generally, a fully charged 6Ah 40V pack cuts about one-third of an acre. Steep slopes and thick, wet grass will reduce that number fast, so plan your mowing route accordingly.
How to Start Your Ryobi Lawn Mower Safely

Ryobi RY40190 40-Volt Brushless Mower
Check PriceUnlike gas mowers, Ryobi electric mowers do not require yanking a recoil cord. Starting one is a smooth two-step process, but safety interlocks are strict for a reason. First, insert the safety key fully into the slot on the battery housing or handle dash. Without the key seated correctly, the mower will not power on at all, even if the battery is fully charged.
Next, press and hold the start button or push the small rubberized safety button on the handle, depending on your model. While holding that button, pull the bail handle toward the main grip bar. The mower should spring to life instantly with a steady electric hum. If the blades do not spin, recheck the safety key, battery charge, and handle locking knobs. Loose handle connections are the most common culprit for start failures.
Releasing the bail handle shuts the mower off immediately. Practice this motion a few times before you walk onto the lawn. Electric mowers have instant torque, so there is no clutch lag. Keep both hands on the handles at all times while the blades are active. If you need to momentarily pause, simply let the bail go, the mower will reboot quickly when you pull it again.
Adjusting the Cutting Height Correctly

Ryobi RY40180 40V Brushless Mower Kit
Check PriceRyobi mowers offer a single-lever height adjustment system that moves all four wheels simultaneously. You will find the lever near the left wheel, marked with numbers or visual symbols. Ryobi typically provides seven positions, ranging from about 1.5 inches to 4 inches. Never adjust the height while the mower is running, the deck might shift abruptly and pinch your fingers.
For early spring mowing, use a higher setting to avoid scalping the crown of cool-season grasses. Bermuda grass thrives at shorter heights, so you can go down to 1.5 inches gradually during peak summer. A good rule is to never remove more than one-third of the grass blade length in a single pass. If your lawn has grown very tall, set the deck high, mow once, then lower the height and mow again a few days later.
Mowing Techniques for a Healthy Lawn

RYOBI RY40LM10-Y Smart Trek Mower
Check PriceWalking at a consistent pace prevents clumps and uneven patches. With self-propelled Ryobi models, you engage the drive lever and let the mower pull you forward, guide it gently rather than fighting it. For push-only models, a steady, unhurried stride works best. Overlap each pass by about two to three inches to avoid leaving thin strips of uncut grass.
Always mow when the grass is dry. Wet clippings clump under the deck, clog the discharge chute, and strain the motor. If you must cut damp grass, use the side discharge chute instead of the bag to prevent constant clogging. Raise the cutting height one notch and walk slightly slower. After finishing, clean the deck underside promptly to prevent corrosion and blade imbalance.
Change your mowing pattern weekly. If you always cut north to south, the grass leans in that direction and develops ruts. Alternate with diagonal or east-west passes. This simple habit encourages upright growth and reduces wear on the mower’s wheels. On slopes, mow across the incline with a walk-behind mower, never up and down, to protect both your footing and the machine’s motor.
Using the Mulching, Bagging, and Side Discharge
Ryobi mowers come with a mulching plug already installed inside the deck. Mulching chops clippings into fine pieces that sink into the soil, returning nitrogen to your lawn. For mulching, remove the grass bag and ensure the rear discharge door is completely closed. The plug must sit flush, a rattling noise usually means it popped loose.
To switch to bagging, lift the rear door, slide the bag frame onto the hooks, and the mulching plug will automatically be sealed off. Empty the bag when it is about two-thirds full, a heavy bag strains the motor and reduces vacuum lift. Side discharge works best for extremely tall grass. Attach the chute over the side opening, and the mower fires clippings out to the right. Always direct the discharge toward the previously cut area to avoid spraying clippings onto uncut grass.
Cleaning and Maintenance After Each Use
RYOBI RY40LM10-Y Smart Trek Mower
Check PriceGrinding to a halt never fixed anything. After you finish mowing, remove the safety key and battery packs before any cleaning. Turn the mower on its side with the carburetor, or in this case the motor housing, facing upward. Use a plastic scraper or a stiff brush to remove packed grass from the deck underside. Avoid spraying water directly into the motor vents, electric components are sensitive to moisture intrusion.
Inspect the blade for nicks and dullness every ten mowing hours. A sharp blade cuts cleanly and reduces strain on the motor. You can sharpen the blade yourself with a file or take it to a service center. When reinstalling, tighten the blade bolt to the torque specification listed in your manual, usually around 26 to 37 foot-pounds, to prevent wobble.
For any detailed torque specs and replacement part numbers, refer to Ryobi’s official product support page. Wipe down the plastic deck and handle with a damp cloth. Keep the battery contacts clean using a dry cotton swab, dirty pins cause intermittent power loss and false charge errors.
Storage Tips to Extend Battery Life
Lithium-ion batteries dislike extreme temperatures. Store the battery indoors, away from direct sunlight and freezing garages. Ideally, keep it at around 50% to 75% charge for long-term storage. Ryobi chargers feature a maintenance mode that safely keeps the pack full without overcharging, but you should still unplug the charger once the job is done.
Fold the mower handles down and stand it vertically if you have a space-saving model. Do not rest the mower on its side for months, oil from the gearbox, if present, can seep into places it should not be. Cover the mower with a breathable fabric cover to keep dust and garage humidity off the electronics. Store the safety key in a separate drawer so no one accidentally starts the mower while you are maintaining it.
Troubleshooting Common Issues
- Mower does not start: Verify the safety key is fully inserted, the battery is charged, and the handle is locked. Reconnect the battery and try again.
- Blade stops under load: You might be cutting grass that is too tall. Raise the deck height and mow slower. Check that the blade is not binding on a stick or caked mud.
- Uneven cut: Inspect wheel height settings and tire pressure if your model has inflatable wheels. Reinstall the blade correctly and confirm the mower deck is not tilted.
- Battery drains very fast: Long, wet grass and hot ambient temperatures dramatically reduce runtime. Allow the battery to cool and mow in cooler morning hours.
- Self-propel drive not engaging: Ensure the drive cable at the handle is tight. Adjust the tension with the barrel adjuster until the mower moves forward when you squeeze the paddle.
Frequently Asked Questions
Can I use my Ryobi lawn mower in the rain?
No. Ryobi mowers are rated for dry conditions. Water entering the motor housing can cause a short circuit and void the warranty. Wait until the grass and soil surface are completely dry before you start. If you get caught in a sudden drizzle, shut off the mower immediately and move it to a covered area.
How long does a Ryobi 40V battery last per charge?
Runtime depends on battery amp-hour rating and grass conditions. A 6Ah battery typically provides 35 to 45 minutes of continuous mowing on flat, dry turf. Using a 4Ah pack drops that to around 25 minutes. Self-propelled models consume more power, so you may see 30 minutes with a 6Ah pack on slopes.
Do I need to replace the blade often?
Under normal residential use, a Ryobi mower blade stays sharp for one full season. If you hit rocks or roots regularly, you may need to sharpen it twice per season. Replace the blade immediately if it is bent or cracked, operating with a damaged blade is unsafe and can ruin the motor shaft.
Can I mulch leaves with a Ryobi mower?
Absolutely. Use the mulching plug and mow over a light covering of dry leaves. The mower will shred them into fine particles that break down quickly. For heavy leaf cover, make two passes or use the bagging option to collect the shredded leaves for compost.
Conclusion
Mastering how to use a Ryobi lawn mower is all about respecting the safety interlocks, understanding your battery’s limits, and adapting your cutting technique to the season. When you nail the basics, the mower rewards you with whisper-quiet starts, zero emissions, and a perfectly even lawn. Keep those blades sharp, the deck clean, and the battery stored properly, and your Ryobi will handle spring, summer, and fall with very little fuss.
Take five minutes after each mow to scrape the deck and wipe down the contacts. Invest in a second battery if your property stretches beyond half an acre, having a backup pack removes range anxiety completely. With the tips in this guide, you are now equipped to get professional results from a machine that makes mowing feel less like a chore and more like a quick spin around the yard.
